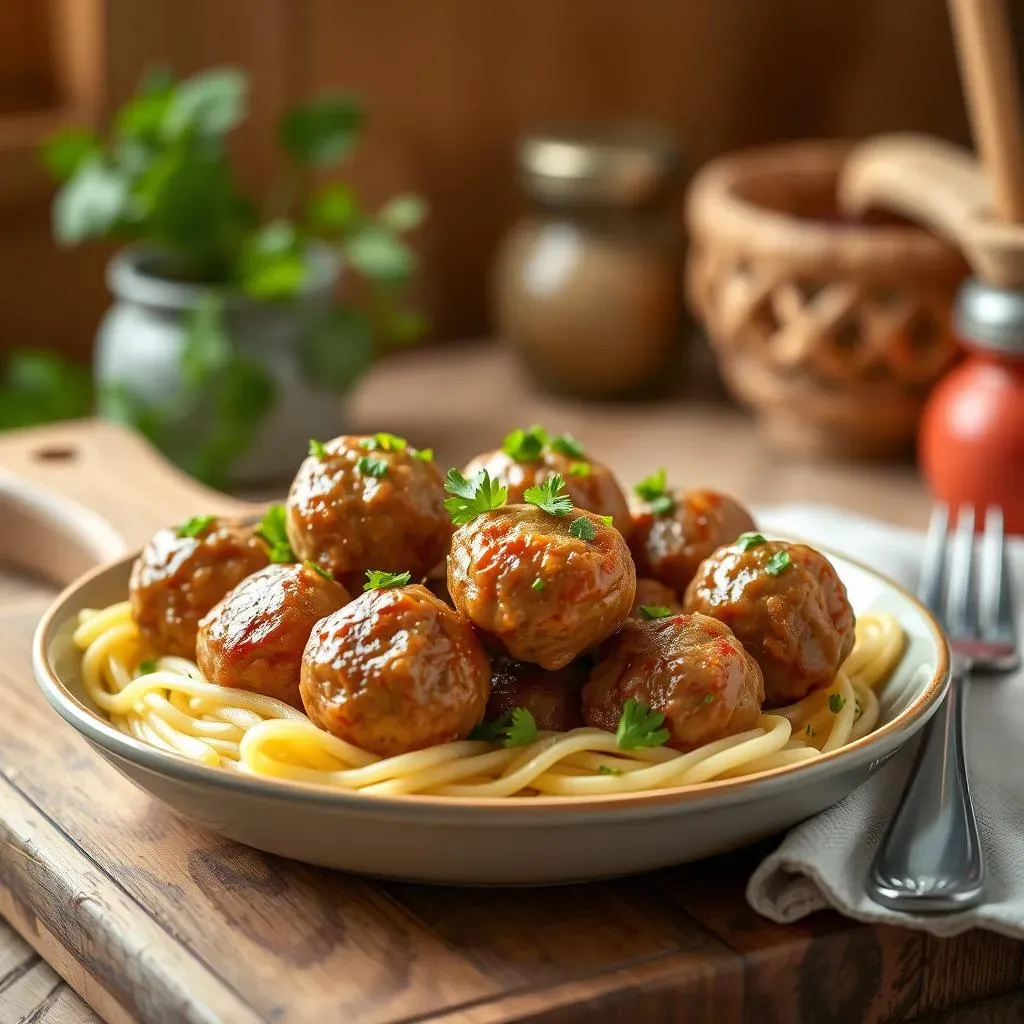
Ever dream of those creamy, savory Swedish meatballs you find at fancy restaurants, but think they're too hard to make at home? Well, get ready to be amazed! This isn't some complicated, chef-level challenge. I'm here to show you how to whip up an easy Swedish meatball recipe with sour cream that's so simple, even a kid could do it (with a little help, of course). We're talking tender, flavorful meatballs swimming in a luscious, tangy sauce, all made with everyday ingredients and minimal fuss. Forget spending hours in the kitchen; this recipe is all about maximum flavor with minimum effort. I’ll walk you through each step, from mixing the meat to simmering it in that dreamy sauce. We'll cover some pro tips to make sure your meatballs are the best they can be, how to adjust the recipe to your liking, and even how to store any leftovers (if you have any!). Prepare to be the star of your next dinner party with this surprisingly easy and delicious dish. Let’s get cooking!
Crafting the Perfect Swedish Meatballs
Crafting the Perfect Swedish Meatballs
The Meatball Mix: The Foundation of Flavor
so you want amazing Swedish meatballs? It all starts with the mix. Don't just grab any old ground beef; we need a blend. I like using a mix of ground beef and ground pork—it gives you that perfect balance of richness and tenderness. Think of it like a good partnership; they complement each other beautifully. Now, for the flavor bomb, we're not skimping on the seasonings. We're talking finely chopped onion, soaked breadcrumbs (yes, soaked!), a touch of nutmeg, allspice, salt, and pepper. Don't be shy with the spices; they're what make these meatballs truly Swedish. Mix everything gently, use your hands! But don't overwork it, or you'll end up with tough meatballs, and nobody wants that.
The key here is to keep everything light and fluffy. The soaked breadcrumbs are crucial; they add moisture and help bind everything together without making the meatball dense. I usually use milk to soak mine, but some people use cream for extra richness. It's up to you. This is where you'll find your sweet spot. And remember, the finer you chop the onion, the better it blends into the meat, no big chunks of onion in your meatballs! So take your time and get the mix just right. This is where the magic begins.
Ingredient | Purpose |
|---|---|
Ground Beef & Pork Blend | Richness and tenderness |
Finely Chopped Onion | Flavor and moisture |
Soaked Breadcrumbs | Binding and moisture |
Nutmeg & Allspice | Classic Swedish flavor |
Salt & Pepper | Seasoning |
Shaping and Browning: Locking in the Goodness
Alright, now that you've got your perfect meatball mix, it's time to shape them. I like to use a small ice cream scoop to make sure they're all the same size. It’s not about being perfect, but it helps them cook evenly. Roll them gently between your palms until they're nice and round. Don't press too hard, you want them to be light and airy, not dense and hard like golf balls. I usually aim for about 1-1.5 inches in diameter, but you can adjust based on your preference.
Next up, browning! This is where we get that beautiful color and add layers of flavor. Heat some butter and oil in a large skillet over medium-high heat. Once it's hot, add the meatballs in batches, making sure not to overcrowd the pan. You want to give them space to brown properly. Turn them every few minutes until they're golden brown on all sides. Don’t cook them all the way through here; we just want a nice sear. This step is key for building flavor and getting those lovely caramelized bits that add so much to the final dish. We're not trying to cook them through, just lock in the flavor.
Easy Sour Cream Sauce: A StepbyStep Guide

Easy Sour Cream Sauce: A StepbyStep Guide
Making the Roux: The Magic Thickener
Alright, let's talk sauce – the heart and soul of this dish. We're not going for some watery, sad excuse for a sauce; we want thick, creamy goodness that clings to every meatball. The secret? A roux! Don't let the fancy name scare you; it’s just butter and flour cooked together. Melt some butter in the same skillet you used for the meatballs (don't wash it – all that flavor is still there!). Once melted, add an equal amount of flour and whisk constantly for a minute or two. This will form a paste, and it's this paste that will thicken our sauce. It’s like the glue that holds everything together and gives it body. Keep whisking, and don't let it burn; that’s the golden rule of roux-making.
You'll know it's ready when it starts to smell a little nutty and turns a light golden color. This process is more important than you might think. It gets rid of that raw flour taste and sets the stage for a smooth, silky sauce. If you skip this step, you’ll end up with a grainy sauce, and that's not what we're aiming for. So, be patient, whisk away, and trust me, it's worth the effort.
Ingredient | Purpose |
|---|---|
Butter | Base for the roux, adds richness |
Flour | Thickening agent |
Whisking | Ensures smooth, lump-free roux |
Building the Flavor: Broth and Beyond
Now, for the liquid gold! Slowly pour in beef broth, whisking all the time. This is important to prevent lumps. Keep that whisk moving, like you're trying to win a whisking competition. Once the broth is incorporated, add a little chicken bouillon for extra depth. This is my secret weapon; it adds a savory punch that takes the sauce to another level. Some people use Worcestershire sauce, which is also a great addition. You can even add a dash of Dijon mustard for a little tang, it’s really up to you and your taste. Let the sauce simmer gently for a few minutes, allowing it to thicken slightly. Don’t rush this step; let the flavors marry and mingle.
At this point, taste the sauce and adjust the seasonings as needed. Salt and pepper are a must, but you might want a little more of the bouillon or Worcestershire sauce depending on your palate. Remember, we’re building layers of flavor here, so don’t be afraid to experiment and make it your own. This is your chance to really personalize the sauce. The goal is a savory, rich base for that creamy finish.
The Creamy Finish: Sour Cream Magic
Finally, the star of the show: sour cream! Reduce the heat to low, and gently stir in the sour cream. Don't let the sauce boil after adding the sour cream, or it might curdle. We want a smooth, creamy texture, not a separated mess. Use full-fat sour cream for the best results; it gives you the creamiest, richest sauce. Stir it in until it's completely incorporated and the sauce is a beautiful, pale color. This is where the sauce transforms from good to amazing.
Now, gently add the browned meatballs back to the sauce. Let them simmer for a few minutes to heat through and soak up all that delicious flavor. Spoon the sauce over the meatballs, ensuring they're all nicely coated. And there you have it – a luscious, creamy Swedish meatball sauce that’s ready to be devoured. It’s tangy, it’s savory, and it's the perfect complement to the meatballs you worked so hard to create. Get ready for a flavor explosion!
Cooking Methods and Serving Suggestions
Cooking Methods and Serving Suggestions
Simmering to Perfection: The Gentle Approach
So, you’ve got your meatballs browned and your sauce ready to go, what's next? Well, I'm a big fan of letting things simmer. After you add the meatballs back to the sauce, reduce the heat to low and let them gently cook for about 10-15 minutes. This allows the meatballs to fully cook through and really soak up all that amazing sauce. It's like a flavor bath for the meatballs. Plus, it gives the sauce a chance to thicken even more. Don't rush this part; slow cooking is the key to tender, flavorful meatballs. I always say, patience is a cook's best friend, and this step proves it. Trust me, you'll taste the difference.
If you're in a hurry, you could technically skip the simmering and just heat everything through, but you'd be missing out on a lot of flavor. It’s like reading a summary of a book instead of enjoying the full story. Take the time to let those meatballs and sauce become best friends. You won't regret it. And remember, keep the heat low to prevent the sauce from sticking to the bottom of the pan. Nobody wants a burnt sauce, right?
Cooking Method | Benefits |
|---|---|
Low Simmering | Tender meatballs, maximum flavor absorption |
Gentle Heating | Prevents sauce from curdling or burning |
Serving Suggestions: The Perfect Pairings
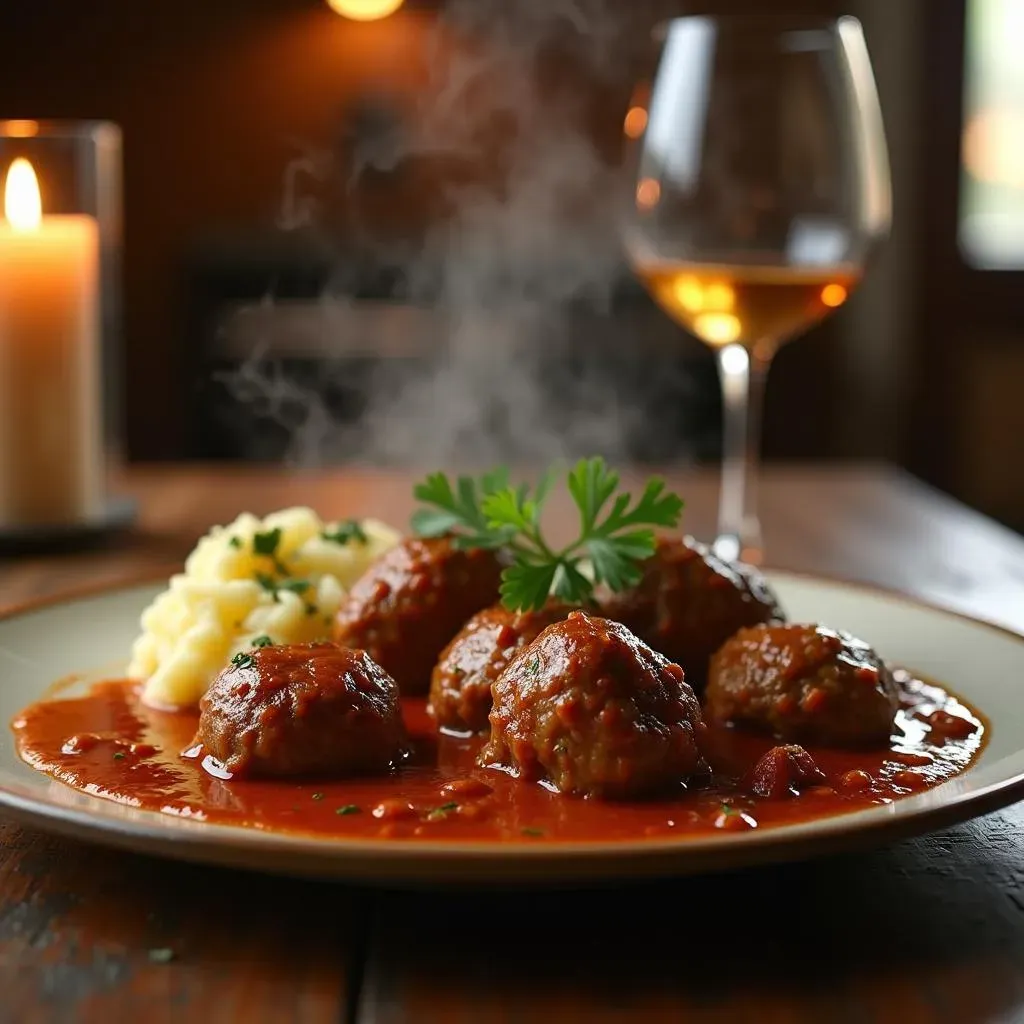
so your meatballs are cooked to perfection, now what to serve them with? Well, traditionally, Swedish meatballs are served with mashed potatoes, and honestly, it's a classic for a reason. The creamy potatoes are the perfect canvas for the rich, savory meatballs and tangy sauce. I like to add a little butter and cream to my mashed potatoes for extra richness, but that's just me being extra. You could also use egg noodles, which are another great option and soak up all that delicious sauce beautifully. They're like little sponges for flavor.
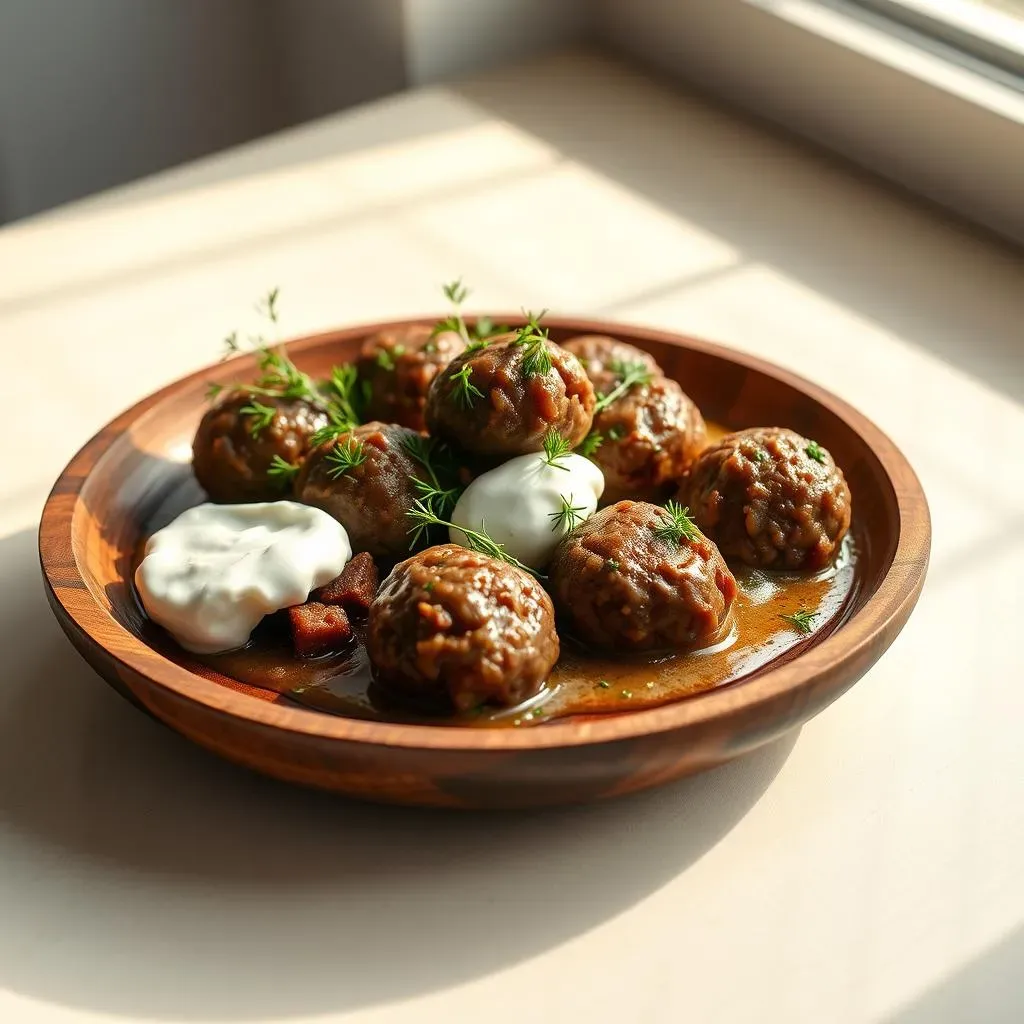
Another option I like to do if I am feeling fancy is boiled small potatoes with some fresh dill sprinkled on top. It adds a nice freshness to the dish. But honestly, the possibilities are endless. You could even serve them over rice, polenta, or even with a side of roasted vegetables. It’s all about what you enjoy. Don’t be afraid to get creative and try new things. The key is to have something that complements the richness of the meatballs and the creaminess of the sauce. It's your plate, do what makes you happy!
Garnishes and Finishing Touches: Elevating Your Dish
Finally, let's talk about the finishing touches. A little sprinkle of fresh parsley or dill can really brighten up the dish and add a pop of color. It's like adding a little sparkle to a beautiful outfit. A dollop of lingonberry jam on the side is also a traditional Swedish accompaniment, and it adds a nice sweet and tart contrast to the savory meatballs. It's like a little party in your mouth. I know, it might sound weird, but trust me on this one. You can find it in most stores or online.
And there you have it, your easy Swedish meatballs with sour cream are ready to be devoured! Whether you're serving them for a family dinner or a fancy dinner party, they’re sure to be a hit. Remember, cooking is all about having fun, so don't be afraid to experiment and make this recipe your own. Enjoy the delicious results of your hard work, and get ready for some serious compliments. You deserve it!
Tips for Customizing and Storing Your Swedish Meatballs with Sour Cream
Tips for Customizing and Storing Your Swedish Meatballs with Sour Cream
Spice it Up: Customizing Your Meatballs
So, you’ve mastered the basic recipe, but what if you're feeling a little adventurous? Well, the beauty of this dish is that it's super easy to customize. If you like a bit of heat, try adding a pinch of red pepper flakes to the meatball mix or a dash of hot sauce to the sauce. For a more herbaceous flavor, mix in some fresh herbs like thyme or rosemary. You could even throw in a clove of minced garlic to the meatball mixture. The world is your oyster, or in this case, your meatball!
And let’s talk about the sauce! Want a richer flavor? Use beef broth instead of chicken, or try a mix of the two. You could also add a splash of red wine while it's simmering for a more complex flavor. If you prefer a lighter sauce, use low-fat sour cream or even Greek yogurt. Don’t be afraid to experiment and find what works best for you. Cooking is all about playing around and having fun in the kitchen. I’ve tried a lot of different variations, and I always discover something new. So, go ahead and make this recipe your own!
Customization | Suggestion |
|---|---|
Spice | Red pepper flakes, hot sauce |
Herbs | Thyme, rosemary |
Broth | Beef, chicken, or a mix |
Sauce | Red wine, low-fat sour cream |
Storing Your Leftovers: Keeping the Goodness Fresh
Alright, so you’ve made a big batch and now you have some delicious leftovers. Don't let them go to waste! The best way to store your Swedish meatballs with sour cream is in an airtight container in the fridge. They’ll keep for about 3-4 days. Make sure they’re cooled down before you put them in the fridge; otherwise, you might get condensation, which can make them a bit soggy. Nobody wants soggy meatballs.
When you’re ready to reheat, you have a few options. You can gently warm them up in a saucepan over low heat, stirring occasionally. You can also reheat them in the microwave, but be careful not to overheat them, or the sauce might separate. My personal favorite is to reheat them in a skillet with a little bit of butter or oil. It gives them a nice little sear and adds some extra flavor. Leftovers can be your best friend, especially when they taste as good as these meatballs do. So, don't be afraid to make a big batch and enjoy them for a few days. It’s like having a delicious meal ready whenever you want it!
Wrapping Up Your Swedish Meatball Adventure
So, there you have it—a ridiculously easy Swedish meatball recipe with sour cream that’s sure to become a staple in your kitchen. From crafting the perfect meatballs to simmering them in that heavenly sauce, you’ve seen how simple it is to create a dish that tastes like it took hours. The best part? You can tweak it to your heart’s content, making it your own signature meal. Whether you serve it over mashed potatoes, egg noodles, or even rice, these meatballs are bound to be a crowd-pleaser. Don't be surprised if you find yourself making this recipe again and again. Happy cooking, and more importantly, happy eating!